
¶ Getting Started
Learn how to set up Harvester for your first session
¶ 🧠 How It Works
Harvester uses an in-game menu system to configure targets. Instead of typing IDs or coordinates, you simply right-click on in-game entities directly in the game world. The plugin captures what you click and uses that as your target. The custom setting menu actions open a new window to configure what action you would like to use such as "Chop" or "Mine". This makes setup braindead and less error-prone!
¶ Step 1: Choose Your Action Mode
Open the Harvester config panel and select your Action Style based on what you want to do:
¶ Step 2: Set Your Target
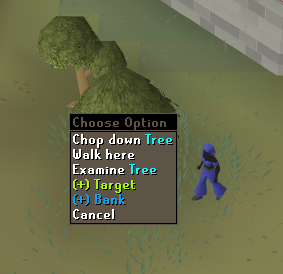
With the plugin panel open, right-click on the object or NPC you want to interact with. You'll see custom menu entries added by Harvester.
• (+) Bank — Sets this object as your banking location
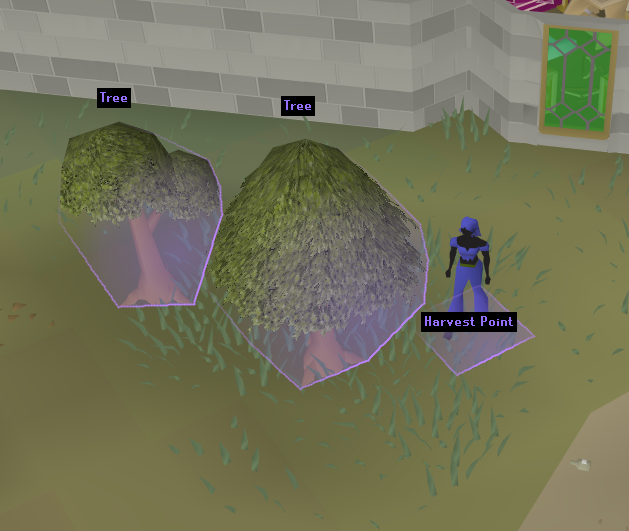
• Highlighted Objects — Glow shows objects within your Working Radius
• Working Radius — How many tiles out from the Harvest Point to scan
¶ Step 2b: Custom Harvest Area (Vacuum mode & Custom Areas)
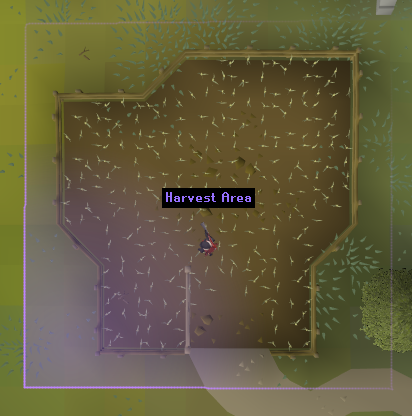
For Vacuum mode or when Custom Harvest Area is enabled, you'll define a rectangular area using two corner points instead of a radius.
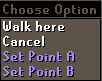
2. Walk to the opposite corner
3. Right-click → Set Point B
4. The area fills in with a purple overlay labeled "Harvest Area"
¶ Step 3: Select Your Interaction
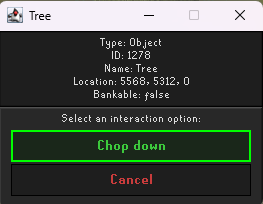
After clicking (+) Target, a popup window appears showing the object's details (Type, ID, Name, Location) and lists all available interactions for that object. Simply click the action you want — for a tree you'd click "Chop down", for a rock you'd click "Mine", etc.
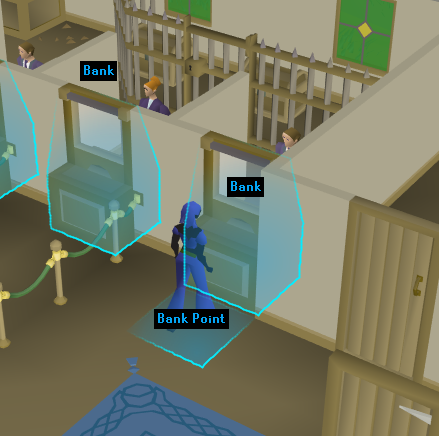
¶ Step 4: Set Your Bank (Bank Items mode)
If using Bank Items mode, right-click on a bank booth, bank NPC, chest, or deposit box and select (+) Bank. The same popup will appear — select the banking interaction and the plugin will walk here when your inventory is full.
¶ Step 5: Set Your Gear & Inventory Setup
Before starting, you'll want to tell Harvester what gear and items to use. Equip everything you plan to wear (axe, graceful, etc.) and fill your inventory with any supplies you need (food, potions, etc.).
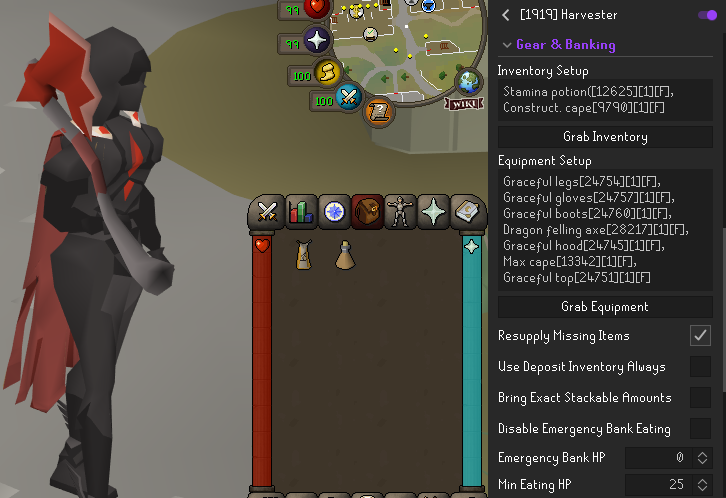
• What to hold onto when depositing (Bank mode)
• What to withdraw when restocking
¶ Step 6: Set Working Radius
The Working Radius determines how far from your set point the plugin will look for targets. A tile marker is dropped when you set your target.
¶ Step 7: Configure Click Settings
These settings add randomization to your clicks for a more natural, human-like feel.
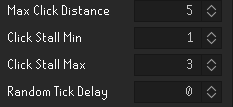
• Click Stall Min — Minimum delay between clicks (20ms intervals)
• Click Stall Max — Maximum delay between clicks (20ms intervals)
• Random Tick Delay — Additional random tick delays between actions
¶ 🚀 Step 8: Start the Plugin!
Hit start and watch Harvester go to work. The side panel will track your harvested items in real-time. If something isn't working right, use "Clear Markers" in the config to reset and start fresh.